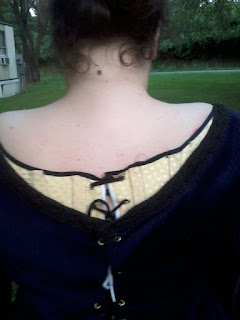
Stays; A Story
 |
| Teasing peek of finished Stays |
To bone it I was first thinking zip ties, but unfortunately they prooved too short for the corset. So, my basket reed, it is! Its flat, about 1/2 an inch wide and very springy. I used black thread for reasons numbering two. Firstly, because I had a full bobbin of black thread. Always the best incentive. Secondly, because I can clearly see my boning lines to assist me in positioning. I ended by using the black bias tape to finish it.
Sort of a bumblebee Stay type thing.
Spent an hour or so boning (hehe), first penning down the lines on the Right side of the lining, then inserting the boning itself. Of course, knowing my luck, some of the boning channels were too small, but reed cust easily and without fuss so we made due. For the busk I used this ruler I happened upon at Wally-world, a hideous camo print but the correct size, springy enough, and with curved edges. It did very nicely. :)
Once pulled through I left an inch or so on either side of the corset, for fitting purposes. The straps I sewed together to steady them until I could bias them together, with a nifty little embroidery stitch on my new, faithful brother.
Then I went a little nuts and had fun with some more embroidery. FOr continuity, of course.
Lastly, I followed the simple directions on the directions and made some easily eyelets.
Previously I imagined that grommets were easier to do, but honetly I have such trouble with them. They never stay were they're supposed to, they never clamp perfectly, and they snag my lacing. So I tried, and succeeded in these easy peasy eyelets.
Not nearly as pretty as fully sewn eyelets but hey! They Work!
I laced the stays together to do a trial fitting. (poor mum, I really should've trimmed it before I tried it on here, huh?)
The stays did their job splendidly. The eyelets held. No seam popped. Off it came my poor mama, I trimmed off the eccess boning, and hand stitched the bias tape on in big, lazy running stitches.


Comments
Post a Comment